On Febuary 29th I got up at 6am along with far too many other geeks and tried to place an order for the newly released Raspberry Pi. The demand was so high for the original 10,000 units that the websites of both distributors were knocked offline. By 8:30 I managed to complete an order with Farnell from my iPhone on the way into work. Yesterday my Raspberry Pi arrived and I could finally get started!
Like any computer the Raspberry Pi needs to be hooked up to a number of peripherals to become useful. The first and most important addition is an SD card with one of the Raspberry Pi OS images loaded onto it. I never got round to preparing this in advance so my first step was to download the
Debian Squeeze image onto my windows XP netbook (my only computer with an SD card writer) and write it to my 8GB SD card (using
Win32DiskImager as per
these instructions).
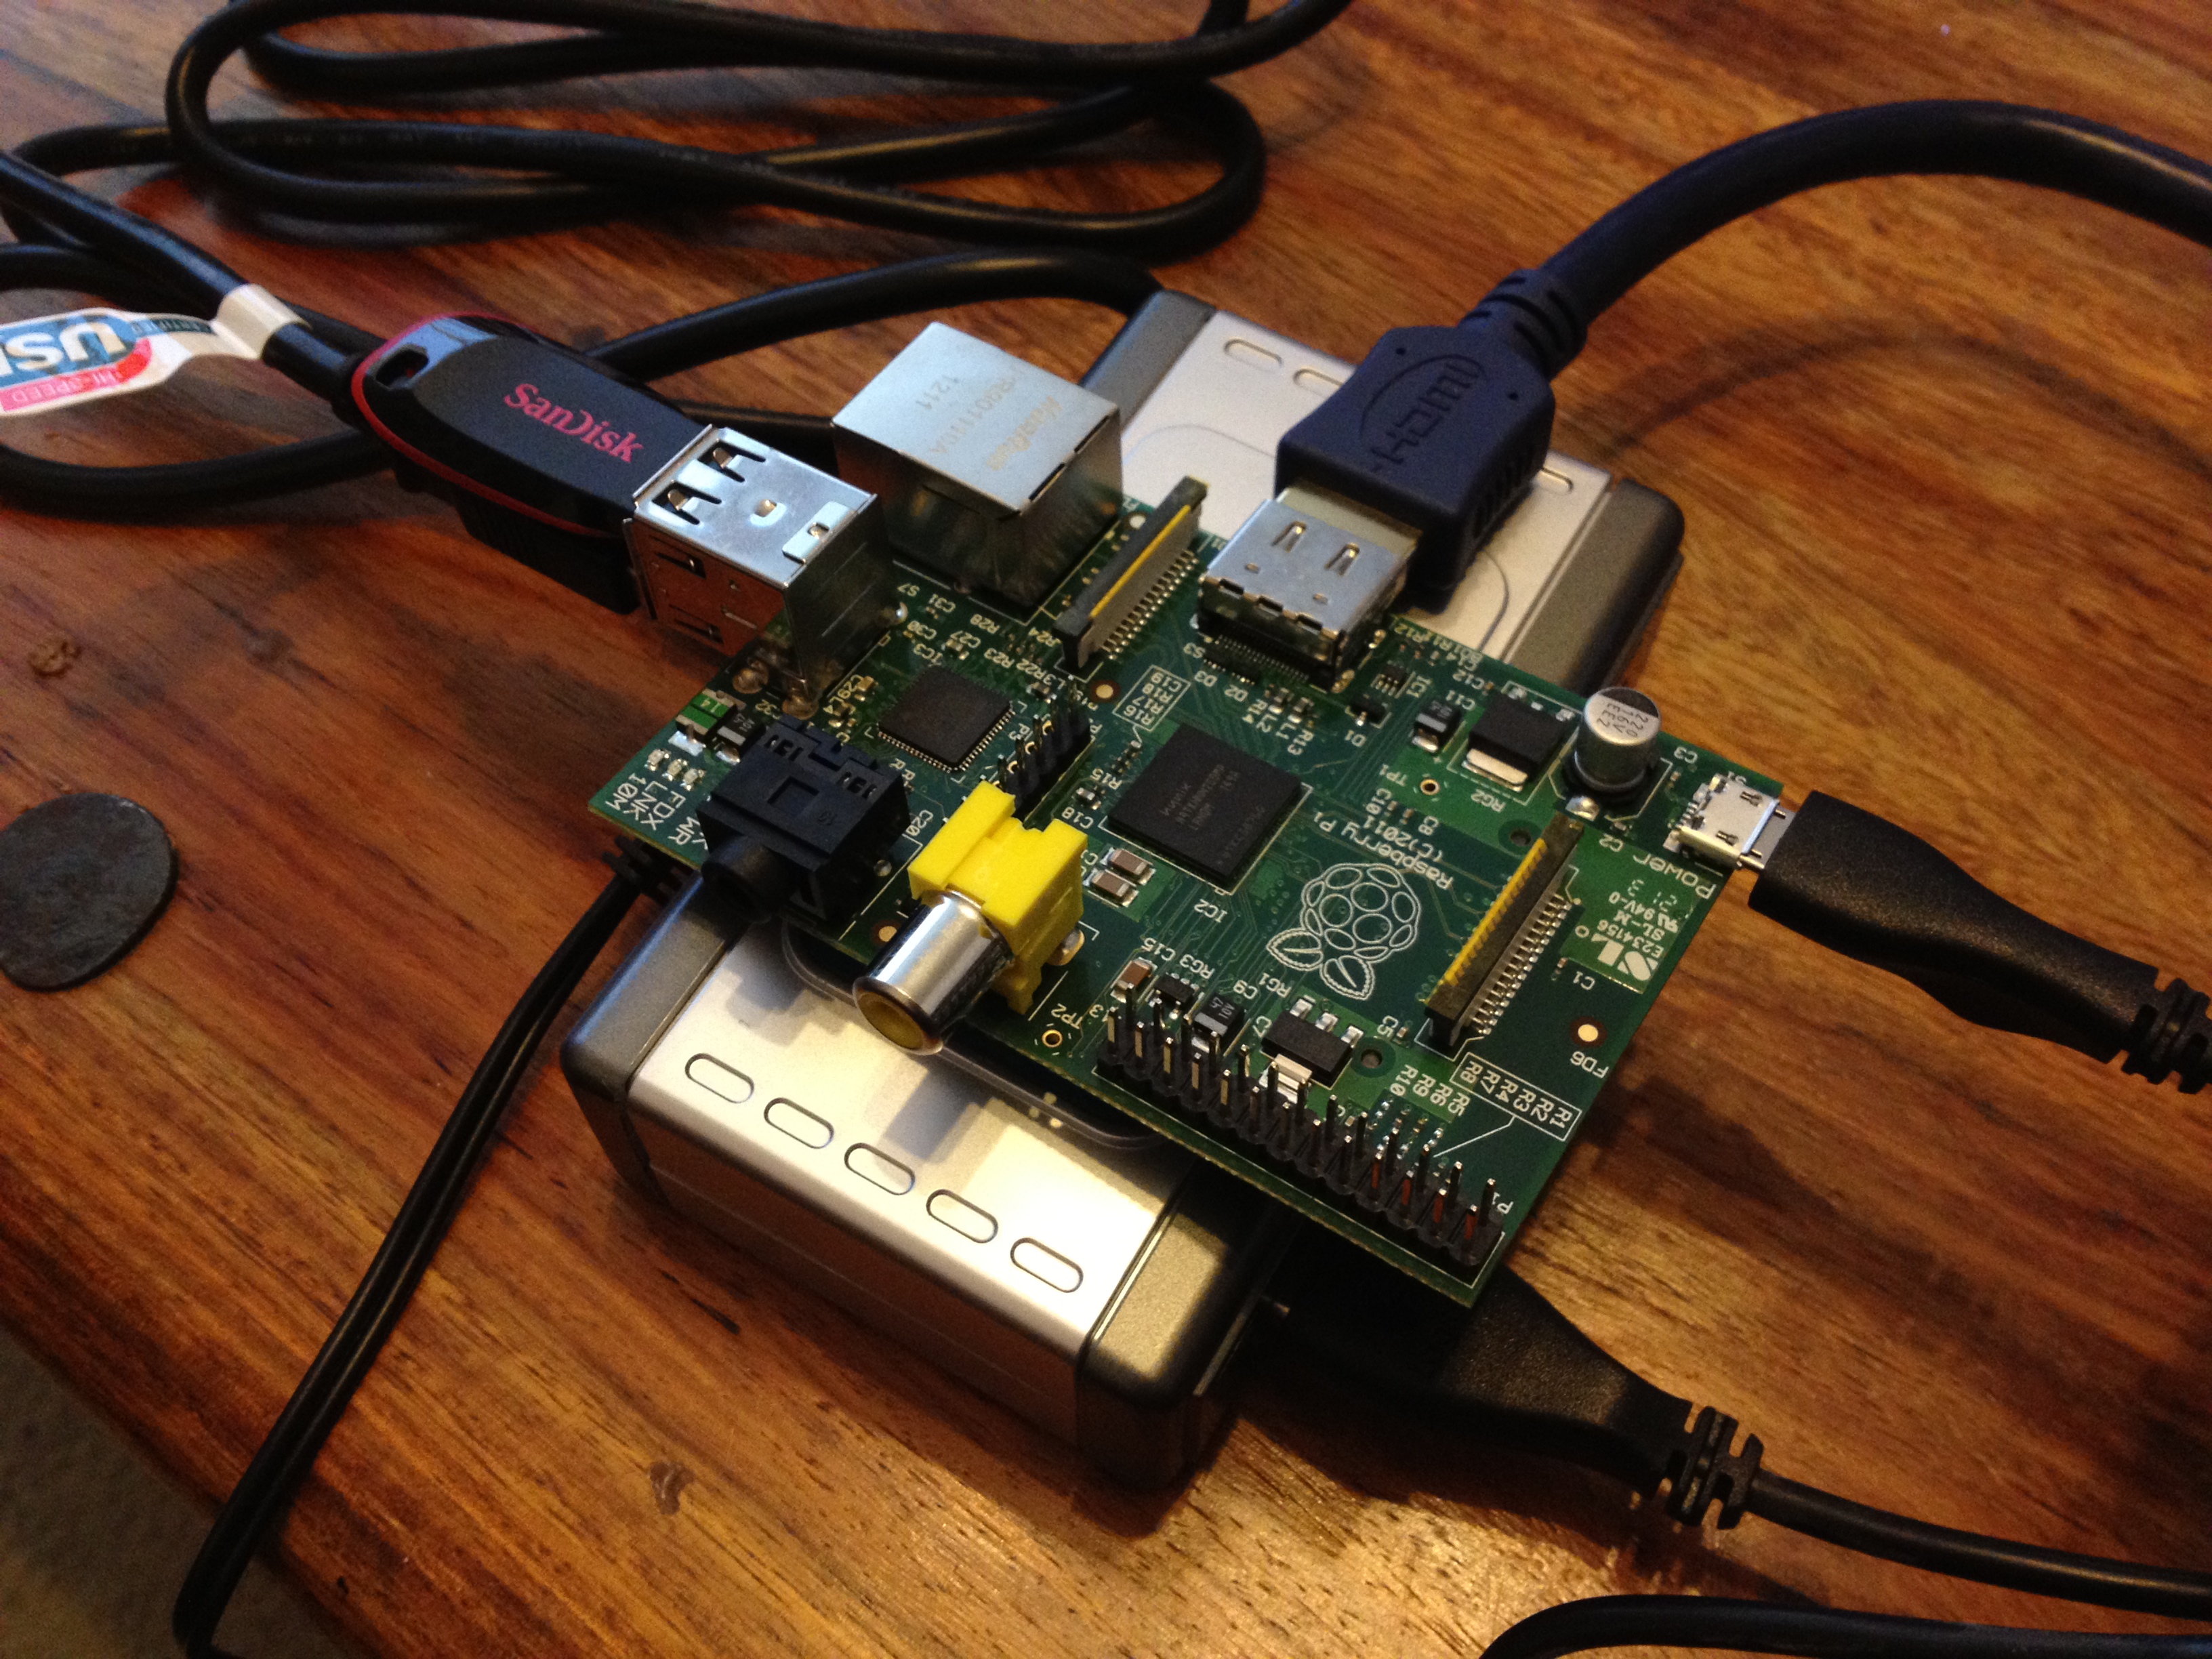
With the SD card ready I connected up my Pi.
- 4 port powered USB hub - this expands the 2 built in USB ports to 5 USB ports. However, I'm using one of the hub ports plus a micro USB cable to power the Pi which only leaves me with 4 ports available.
- 16GB USB memory stick for extra storage.
- Combined USB keyboard/mouse wireless receiver.
- HDMI cable from the Pi to my projector which I will use as the screen.
There is no power switch so as soon as I plug in the USB hub power supply the Raspberry Pi starts booting. Unfortunately the first time I did this there was no output on the screen. Thankfully this was just caused by the HDMI cable being loose in the Raspberry Pi - the connector is quite stiff and I had to push firmly to fully insert my cable. The screen didn't actually display anything with a properly inserted connector but a quick reboot of the Pi was enough to prompt the connection to be detected.
After all this I was rewarded with a login prompt requiring me to head back to the OS downloads page to check the default username and password. Once logged in I set the clock at the suggestion of the welcome message and then considered my next move.
I ultimately want to connect my Pi over wifi and I have an old WG111T USB wifi radio lying around. My first real challenge is to get this USB wifi working. While I work on this I dug out a huge network cable to stretch across my room to my router and hooked up my Pi. Amazingly, after a few seconds the Pi had successfully DHCP'd and I could ping www.google.com. At this point I decided to make my Pi experience a bit prettier and ran startx to launch the GUI.
I had a quick play with the browser and found that things seemed sluggish but usable. An impressive feat for such a cheap device! I was also amused by the -1% CPU being used by some processes :)
Before I got my Pi I had been encouraged about the possibility of getting my USB wifi working thanks to the list of
verified hardware which included the WG111. Unfortunately the verified version was the WG111v2 not the WG111T so I am in fact stepping into uncharted territory. My next post will detail my progress with this task.